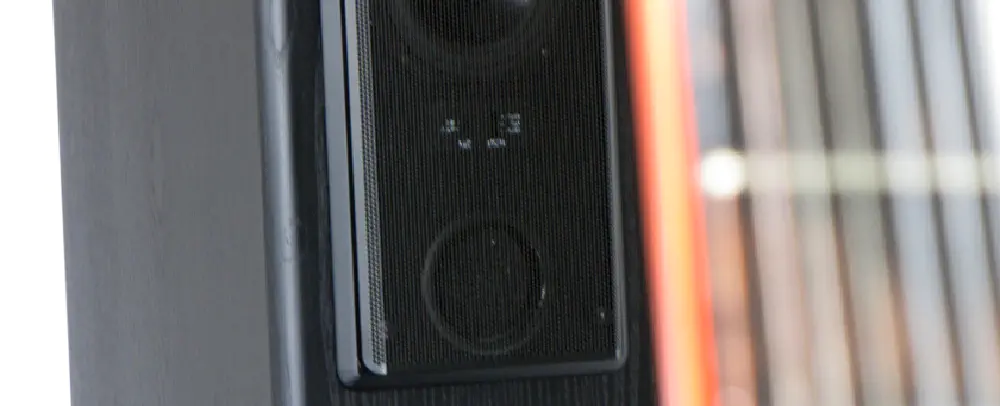
My company gave away a couple of abandoned spare devices previously used for evaluation purposes. So, I got hands on a dreamplug, a socket-plugin sized mini computer (ARM based) with decent power, low energy consumption, integrated dual Ethernet, WiFi, Bluetooth and, most important, an optical audio output - in other words: a Raspberry PI with a housing and the IO I was missing. The digital output was the primary reason for using it as an addon to my stereo.
My stereo was lacking the capability to play mp3/mp4/aac/lossless files without hassle, which means playing music without having to perform any manual action after importing a new CD I bought. I was not satisfied with my current solution, which consisted of a TerraTec NOXON2audio with an attached USB pen drive, as unfortunately it never ran perfectly stable with USB drives with a capacity greater than 64GB. When we developed the device at TerraTec, even 8GB USB drives were beyond “are enough for everybody/anybody wants to pay” capacity.
My other option was using an empty C.A.R. 4000 housing from the 2000s, fit a Raspberry PI and a USB DAC (or PI Audio) inside, hook up the buttons and the display to the GPIOs and build a beautiful HiFi size player. Even if this approach was very tempting, a couple of circumstances made the expected bill of material too high to take the retrofit project into consideration. First, the 3" display. The original CAR4000 uses a parallel powertip display, which takes a lot of GPIO space and requires me to develop a new driver from scratch. New 3" displays are too expensive or take too much GPIOs aswell, so I would have to use shift registers for connecting the control buttons, which also are originally designed to be connected to the controller via ADC - the Raspberry PI does not have an ADC, so I would have had to add an ADC, modify the board or use fancy timing code. None of them was a satisfying option, so I suspended the project.
Simply exchanging any of the gear in my living room was the least acceptable version. My oldschool AVR, built in France in 1999, may not have any retail value anymore, but such a great performance that it simply would not make sense to replace it.
So, using the dreamplug as a hidden addon perfectly was the most viable and promising option in the situation described above.
Use case
The amplifier offers both switched and unswitched power outlets on the rear, I plugged the Dreamplug to the unswitched one and connected the digital output to the digital in of the amp, the 3.5mm jack should go to my multiroom speaker system. This makes the entire solution feel like an upgrade for the unit, not an additional device, and I came to the opinion that reducing the numbers of units in my stereo is not a bad thing. Software stack
Originally, I wanted to build a new Hifi size unit with a display, buttons, incremental encoders and more fancy things. As I have a lot of old tablet computers and mobile phones, it became more attractive to relocate the user interface to an external unit.
Regarding the usecase, music player daemon (MPD) was the fitting solution: It offers a network interface for remote control, a media library, and various input and output plugins. Unlike common clones of platforms such as Google Music, such as Ampache or Subsonic, MPDs primary concern is using the audio output facilities of the machine it is installed on. This results into the following software stack on the device:
- Debian Jessie Linux
- Libertas WiFi drivers for the Marvell WiFI chipset
- Pulseaudio
- MPD
- Alsatools for mixer controls
- sshd for maintainance and file transfer
- rsync for music library synchronization
- udev for automounting
- Golang runtime for a web service that switches the 3.5mm jack on and off to control multiroom
The dreamplug
Unlike the Raspberry pi, the unit does not provide a HDMI output, the only way to get a console is using a UART port. The device has a 4-pin mini connector, the pinout is:
1     GND
2     RX
3     TX
4     3.3V
I used a fan connector from an old VGA card, connected it to a 5V->3.3V serial level converter and used a terminal with the settings 115k/8N1. From there, it was possible to interact with the u-boot bootloader and write a Debian Jessie image to the flash. Music Player Deaemon (MPd)
Just a few changes to the configurations are neccessary:
 1## Where to look for media
 2    music_directory         "/var/lib/mpd/music"
 3    playlist_directory              "/var/lib/mpd/playlists"
 4
 5## Bind to the WiFi interface
 6    bind_to_address         "fe9d::......."
 7
 8## or to any interface:
 9    #bind_to_address         "any"
10
11## Auto update and symlink following
12    auto_update    "yes"
13    follow_inside_symlinks          "yes"
14    follow_outside_symlinks "yes"
15
16## Audio output
17    audio_output {
18            type            "pulse"
19            name            "Audio out"
20    }
To mount the pen drive automatically, udev comes into play:
/etc/udev/rules.d/80-usbautomount.rules
RUN+="/bin/mount -t vfat -o uid=0,gid=46,umask=227 /dev/sdc1 /var/automnt/usb-stick"
Mobile Phone control
Among many options, I choose M.A.L.P (for Android) because of its featureset, the decent UI and the fact that it is open source and free of ads. M.A.L.P requires an initial configuration consisting of the server address and the password. Afterwards, an old spare tablet computer became the control unit for the media player. Multiroom
My home has got ceiling-mounted speakers in all rooms, with a central terminal which I can connect to an external audio source. My amplifier offers a Zone2 functionality, unfortunately it does not work when the main speakers are connected via bi-wiring/bi-amping, which is the case in my setup. So, I needed another solution. In case of the dreamplug, two facts made the decision on the solution very easy:
- The analogue 3.5mm jack is capable of driving passive speakers with an acceptable performance
- The analogue output uses a separate Pulseaudio mixer control, so I can use the digital out to the amp and the analogue * multiroom out independently
The only challenge left was turning the analogue out on and off. Simply pulling the cable was not acceptable. So I decided on writing a slim golang webservice which provided an endpoint for setting the analog output volume and an Angular2 app to provide a simple user interface. The golang webservice
 1package main
 2
 3import (
 4  "encoding/json"
 5  "log"
 6  "net/http"
 7  "os/exec"
 8  "fmt"
 9  "time"
10  "strconv"
11)
12
13// operation:
14// http://dreamplug/api/v1/analog?volume=n (0 <=n <=100)
15
16func runWebserver() {
17    http.HandleFunc("/", handleRequest)
18    http.ListenAndServe(config.http.port, nil)
19}
20
21
22func setupLogging(applicationConfiguration ApplicationConfiguration) {
23    var loggingPrefix = fmt.Sprintf("%s%d ",
24        "echoService:",
25        applicationConfiguration.HTTPPort)
26    log.SetPrefix(loggingPrefix)
27}
28
29func logRequest(request *http.Request, response MultiRoomResponse) {
30    log.Printf("HTTP method=%s remote=%s volume=%d",
31        request.Method,
32        request.RemoteAddr,
33        response.NewVolume)
34}
35
36func assembleResponse(request *http.Request) MultiRoomResponse {
37    newVolume, err := strconv.Atoi(request.URL.Query().Get("volume"))
38
39    if err != nil {
40        newVolume = -1
41    }
42
43    result := MultiRoomResponse{
44        Valid:       (err == nil),
45        NewVolume:   newVolume,
46        RequestTime: time.Now(),
47    }
48    return result
49}
50
51func handleRequest(responseWriter http.ResponseWriter, request *http.Request) {
52    response := assembleResponse(request)
53    logRequest(request, response)
54
55    if response.Valid {
56        out, err := exec.Command("/usr/bin/amixer",
57      "-c",
58      "1",
59      "set", "PCM",
60      strconv.Itoa(response.NewVolume)).Output()
61
62        fmt.Printf("xx %s %s", out, err)
63    }
64
65    jsonResult, error := json.Marshal(response)
66
67    if error != nil {
68        http.Error(responseWriter,
69            error.Error(),
70            http.StatusInternalServerError)
71
72        log.Fatalf("error in handleRequest: %s", error)
73    }
74
75    responseWriter.Header().Set("Content-Type", "application/json")
76
77    fmt.Fprint(responseWriter, string(jsonResult))
78}
Thanks to systemd, the inclusion of the service into the system start process is easy:
 1/etc/systemd/system/zone2.service
 2[Unit]
 3Description=Zone2 Webservice
 4
 5[Service]
 6Type=simple
 7ExecStart=/var/zone2/zone2 --http 8080
 8
 9[Install]
10WantedBy=multi-user.target
The Angular2 application
The Angular2 application just provides a frontend for the webservice, which consists of two simple on/off buttons.
 1import { BrowserModule } from '@angular/platform-browser';
 2import { NgModule } from '@angular/core';
 3import { FormsModule } from '@angular/forms';
 4import { HttpModule } from '@angular/http';
 5import { NgbModule } from '@ng-bootstrap/ng-bootstrap';
 6
 7import { AppComponent } from './app.component';
 8import { MultiroomService } from './multiroom.service'
 9
10@NgModule({
11  declarations: [
12    AppComponent
13  ],
14  imports: [
15    BrowserModule,
16    FormsModule,
17    HttpModule,
18    NgbModule.forRoot()
19  ],
20  providers: [],
21  bootstrap: [AppComponent]
22})
23export class AppModule { }
24
25
26@Component({
27  selector: 'app-root',
28  templateUrl: './app.component.html',
29  styleUrls: ['./app.component.css'],
30  providers: [MultiroomService]
31})
32export class AppComponent {
33  private multiroomService : MultiroomService;
34
35  constructor(multiroomService : MultiroomService) {
36    this.multiroomService = multiroomService;
37    console.log(multiroomService);
38  }
39
40  activateMultiroom() : void {
41    this.multiroomService.setAnalogueOutVolume(90)
42      .subscribe(resp => {
43        console.log(resp);
44      });
45  }
46
47  deactivateMultiroom() : void {
48    this.multiroomService.setAnalogueOutVolume(0)
49    .subscribe(resp => {
50      console.log(resp);
51    });
52  }
53
54}
55
56
57@Injectable()
58export class MultiroomService {
59  private backendUrl : String;
60
61    constructor(private http: Http) {
62      this.backendUrl = '/api/v1';
63   }
64
65   setAnalogueOutVolume(percentage:number): Observable<Response> {
66    return this.http.get(this.backendUrl + '/analog?volume='+percentage);
67 }
68
69}1<h1>
2 Multiroom
3</h1>
4
5<button type="button" class="btn btn-primary" (click)="activateMultiroom()">Activate Multiroom</button>
6<button type="button" class="btn btn-primary" (click)="deactivateMultiroom()">Deactivate Multiroom</button>After installing the Angular2 application, serving it with Nginx, proxy_passing the /api/v1 url segments to the golang service, the device presented a welcome page with the option to turn multiroom on and off.
Podcasting with MPD
Although MPD can archive much, it has no native support for Podcasts, but this functionality can easily by added by taking advantage of the playlisting feature. Here, I created a simple Golang task that retrieves a podcast (using the awesome Podfeed Go library) and converts it into a m3u playlist. This service is triggered by cron.hourly and piped to a file named according to the podcast title inside the MPD playlist folder.
 1package main
 2
 3import (
 4  "log"
 5
 6  "github.com/nandosousafr/podfeed"
 7)
 8
 9
10func main() {
11  conf := buildApplicationConfiguration()
12  podcast, err := podfeed.Fetch(conf.PodcastURI)
13  if err != nil {
14    log.Fatal(err)
15  }
16  conf.ExportFilter(podcast)
17}
18
19package main
20
21import (
22  "log"
23  "flag"
24  "m9d.de/podcast2m3u/exportfilters"
25)
26
27type ApplicationConfiguration struct {
28  PodcastURI string
29  ExportFilter exportfilters.ExportFilter
30}
31
32func buildApplicationConfiguration() ApplicationConfiguration {
33  result := ApplicationConfiguration {
34    ExportFilter: exportfilters.M3u,
35  }
36  flag.StringVar(&result.PodcastURI, "podcast","","p")
37  flag.Parse()
38  return result
39}
40
41
42package exportfilters
43
44import (
45  "github.com/nandosousafr/podfeed"
46)
47
48type ExportFilter func(podcast podfeed.Podcast)
49
50
51package exportfilters
52
53import (
54  "fmt"
55  "github.com/nandosousafr/podfeed"
56)
57
58func M3u(podcast podfeed.Podcast) {
59  fmt.Println("#EXTM3U")
60  for _,episode := range podcast.Items {
61    fmt.Printf("#EXTINF:%d,%s\n%s\n",
62      0,
63      episode.Title,
64      episode.Enclosure.Url)
65  }
66
67}